← All Fusion workflows
Beginner workflowMapPolygonTransformGlowMultiMerge

Animate a Route Line on a Map in Fusion

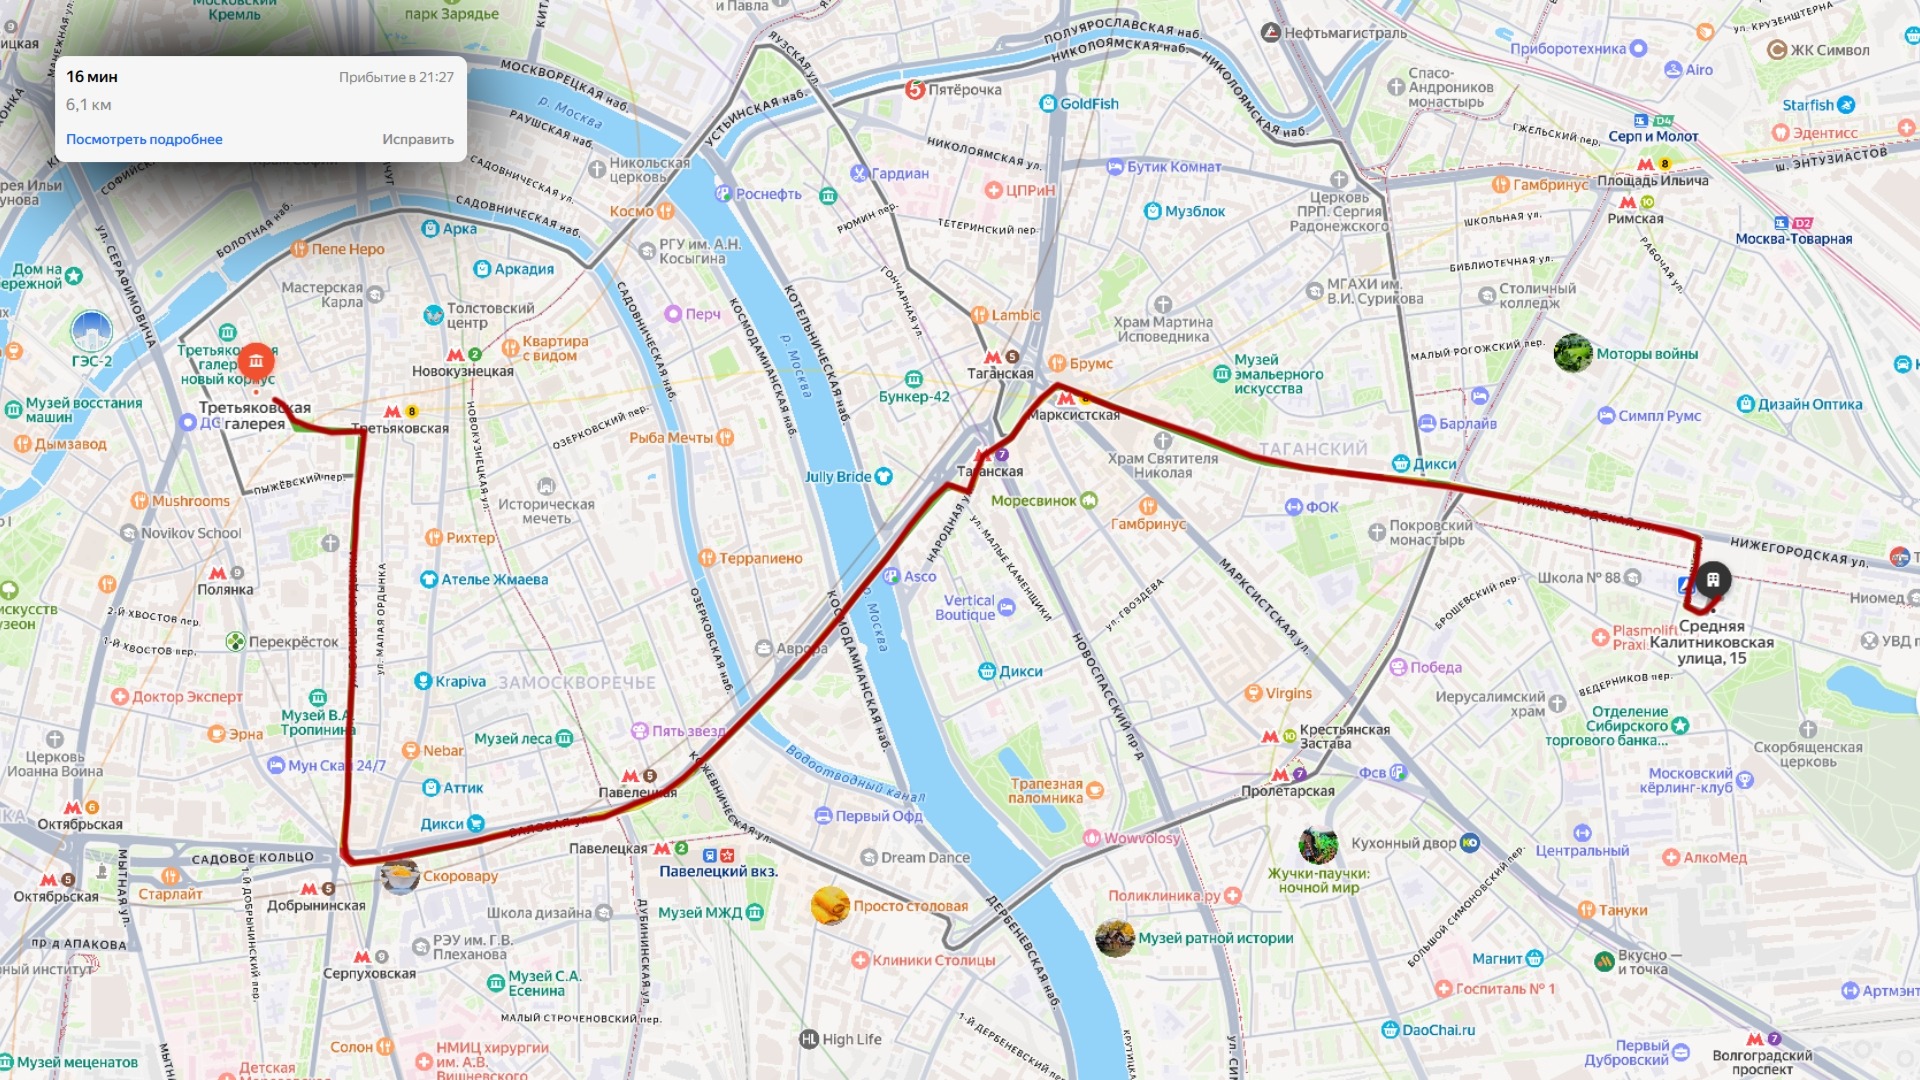
This workflow builds a clean animated route over a map. A map screenshot forms the base, a red route line is drawn with Polygon Mask and Background, then an information card, soft glow and moving marker are composited on top. The technique works well for travel videos, delivery and logistics, navigation inserts, explainers and short-form content.

Final result: Animate a Route Line on a Map in Fusion

Why this graph is built this way

Workflow logic

The graph is split into three independent parts. The map is normalized to the frame with Background and Transform, the route line is drawn separately with Polygon Write Length, and the info card plus marker are assembled and moved on their own Path. Because the parts stay separate, the route can be changed without rebuilding the map or the label animation.
Node tree

Connection diagram

The cable colors follow Fusion conventions: blue is an Effect Mask, neutral lines carry images, and colored ports indicate specific node inputs. Node-page links are intentionally disabled on the English diagram until the matching Fusion Encyclopedia pages are translated.

Node order

How to read the chain

1

Map → Transform2 → Merge3

Scale the map screenshot with Transform, then place it over a transparent Background through Merge. This creates a stable 1920×1080 canvas independent of the original screenshot dimensions.

2

Polygon1 → Background1

Draw the route with Polygon Mask. Background1 provides the red line color while Polygon defines the path and reveals it progressively through animated Write Length.

3

Merge1

Composite the red route over the map. Keeping them separate makes it easy to change the route without affecting map scale or other graphic elements.

4

Rectangle1 → Info card → Background3 → Glow1

The information card is a separate PNG overlay. Rectangle softens its shape, Background3 provides a glow source, Transform3 scales it, and Glow separates it visually from detailed map content.

5

MultiMerge1 → Transform4

MultiMerge assembles the card and glow into one layer. Transform4 follows Path2 so the label can travel with the start or end of the route.

6

Merge2 → MediaOut1

The final Merge combines the map, animated route and moving card before the navigation graphic is sent to MediaOut.

Result

What the shot looks like

The output is a map with a progressively drawn red route, an information card and an animated marker. Because the route writes along its real path instead of appearing all at once, the result reads as navigation graphics rather than a static screenshot.

When to use it

Where it works

  • Travel videos and trip routes.
  • Delivery, logistics and urban-movement explainers.
  • Videos that need to show movement from one location to another.
  • YouTube, Shorts and Reels with maps, roads and navigation graphics.
  • Documentary inserts where a route should draw progressively instead of appearing instantly.

Node parameters

What changes from the defaults

Polygon1

Polygon is both the route shape and its animation controller. Border Width makes it visible as a line and Write Length progressively draws the path.

  • BorderWidth: 0.0031
  • SoftEdge: 0.001
  • WriteLength: 0 at frame 0 → 1 at frame 61
  • Filter: Fast Gaussian
  • Polyline: manually traced along map streets

Background1

Background1 provides the route color. Because Polygon is connected to Effect Mask, the color appears only along the traced line.

  • EffectMask: Polygon1.Mask
  • Width / Height: 1920×1080
  • TopLeftRed: 0.6666667
  • Alpha: controlled by Polygon mask

Transform2

Transform2 fits the map screenshot to the frame and slightly enlarges it to remove unwanted edges and improve route composition.

  • Size: 1.15
  • Input: MediaIn1.Output

Rectangle1 / MediaIn2

Rectangle works as a soft mask for the route information PNG so the card integrates cleanly without harsh edges.

  • Rectangle Width: 1
  • Height: 1
  • CornerRadius: 0.189
  • MediaIn2 EffectMask: Rectangle1.Mask

Glow1

Glow adds a soft halo behind the information card so it remains readable over dense map detail.

  • Blend: 0.189
  • XGlowSize: 52
  • Glow: 0.89
  • Filter: Fast Gaussian

Transform4 / Path2

Transform4 gets its position from Path2, allowing the card to move on a separate trajectory without modifying the map or route line.

  • Center: Path2.Position
  • Path2 Displacement: 0 at frame 0 → 1 at frame 60

Common mistakes

What not to break

  • Do not use a pre-rendered route image if the line needs an animated draw-on; Polygon Write Length is far easier to control.
  • Do not flatten the map, route and label into a single PNG or every route change will require rebuilding the entire graphic.
  • Do not treat the map screenshot as a Fusion encyclopedia node; it is a project-specific media resource.
  • Avoid an excessively thick route line because it quickly hides street labels and important map detail.
  • Do not skip the transparent Background if you need a stable composition resolution.